Back story:
I first tried this coz it seemed like an interesting food trend, but BRO IT IS SO DELICIOUS. If you’re someone who doesn’t enjoy thick pizza bases and feel kind of bloated after – this is for you! Also it is just SOOOOOO TASTY. Like I WANT to eat this even when I’m not on a diet, or it’s my cheat day. It’s SOOOO GOOOD!!! Ok bye make it fast now

You need:
For the Cauliflower Pizza Crust:
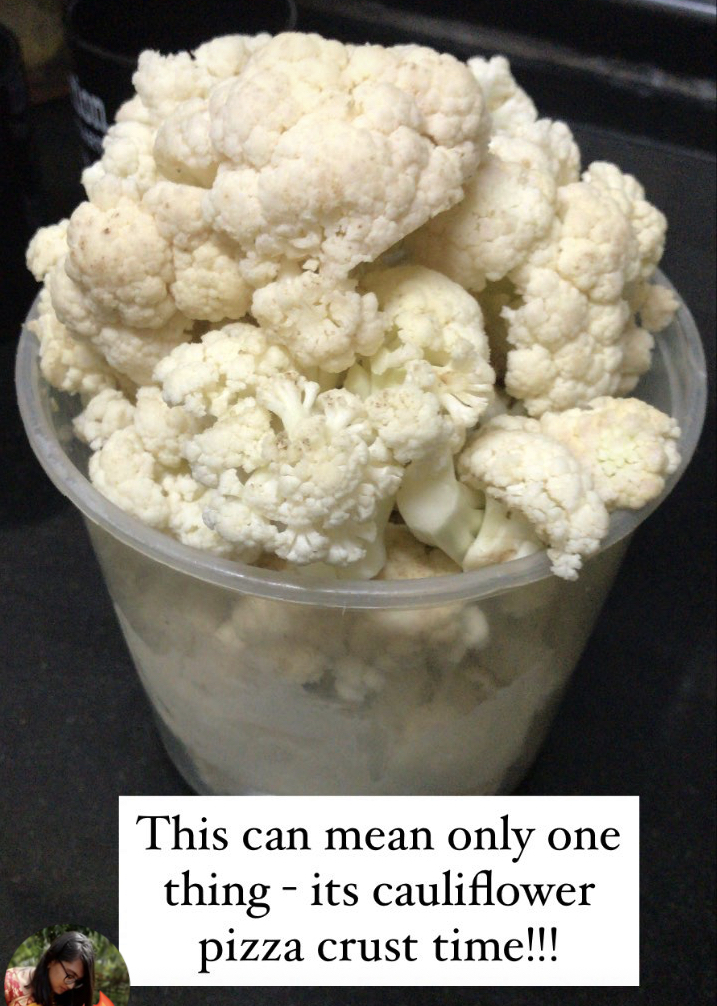
- 1 cauliflower head
- 1/2 cup grated mozzarella cheese
- 1 egg (or 1 flax egg= 1 tbsp flaxseed powder + 2.5 tbsp water if you can’t eat egg)
- 1.5-2 tbsp oregano/mixed herbs/garlic bread seasoning
- 1 tsp salt & pepper to taste (adjust according to the amount of salt in the seasoning)
Toppings:
- 2 tomatoes
- 1 onion
- 1/2 capsicum
- 4 tbsp tomato sauce
- 2 tbsp garlic chutney (optional)
- 1/2 cup shredded mozzarella cheese
How To:

Cauliflower pizza crust:
- Preheat the oven to 200c
- Cut your cauliflower into smaller pieces, making sure that too much of the stem is not there
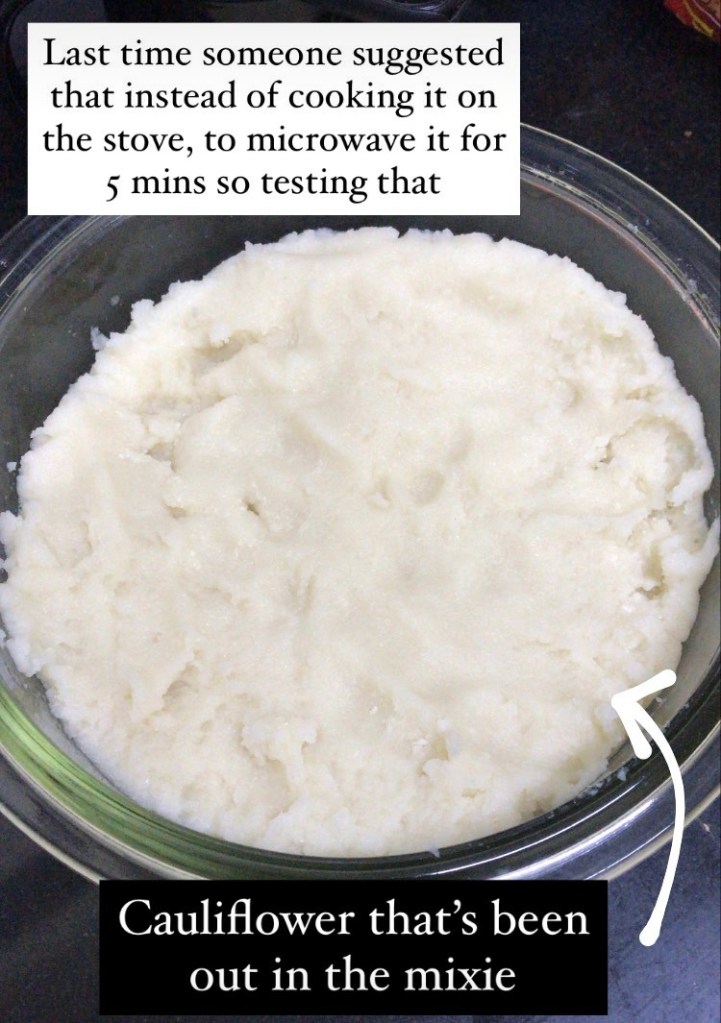
- Put it in the mixie/food processor and pulse until it becomes a smooth paste (don’t add any water as the cauliflower already has water content)
- You might have to make the cauliflower paste in batches, in case you have a small mixie. Whenever done, put it in a microwave-safe bowl
- Microwave the cauliflower paste for 4-5 minutes and then let it cool
- When cool, put it through a muslin/cheese cloth (can also use a very thin towel) and then SQUEEZE all the water out of it
- You need to keep squeezing until it’s completely dry – if you leave the cauliflower soggy it will not hold together and just break apart like scrambled eggs.
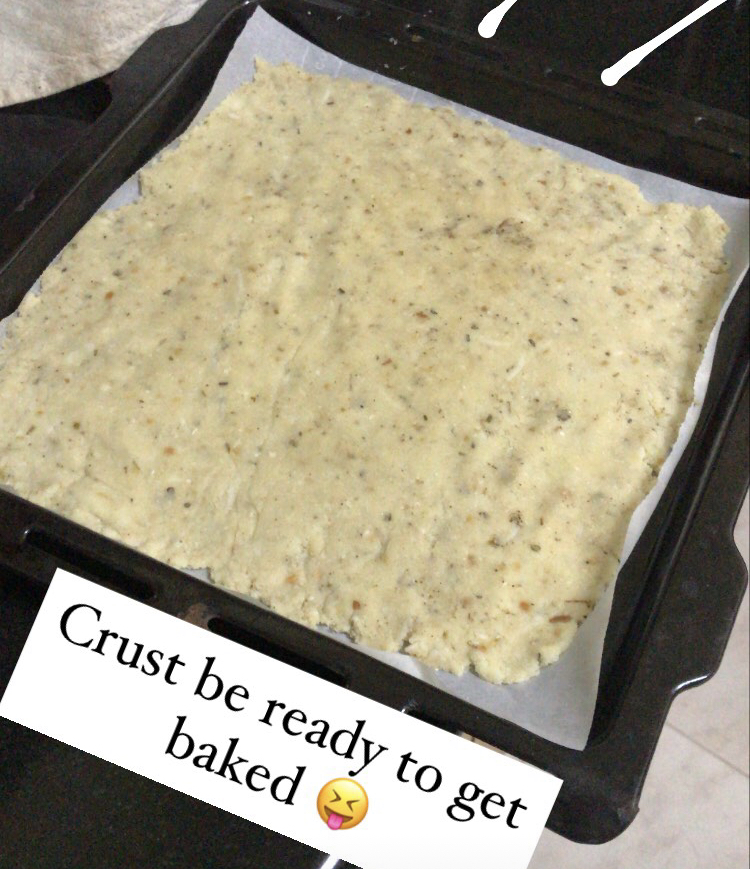
- In a big bowl, combine the squeezed out cauliflower, mozzarella, whisked egg (whisk in a small bowl before adding) and seasonings and salt & pepper
- It should come together like a chapati/pizza dough – you should be able to roll it into a ball without it being too sticky
- Take a baking tray, line it with parchment paper and then press your dough until it covers the base. You can do this with your fingers, or add another baking paper on top and roll it out (you need the baking paper otherwise it’ll stick to your rolling pin)
- Brush the top with a little olive oil (it’ll just help get it golden-y)
- Bake at 200c for 15 minutes until the edges start to get golden-brown
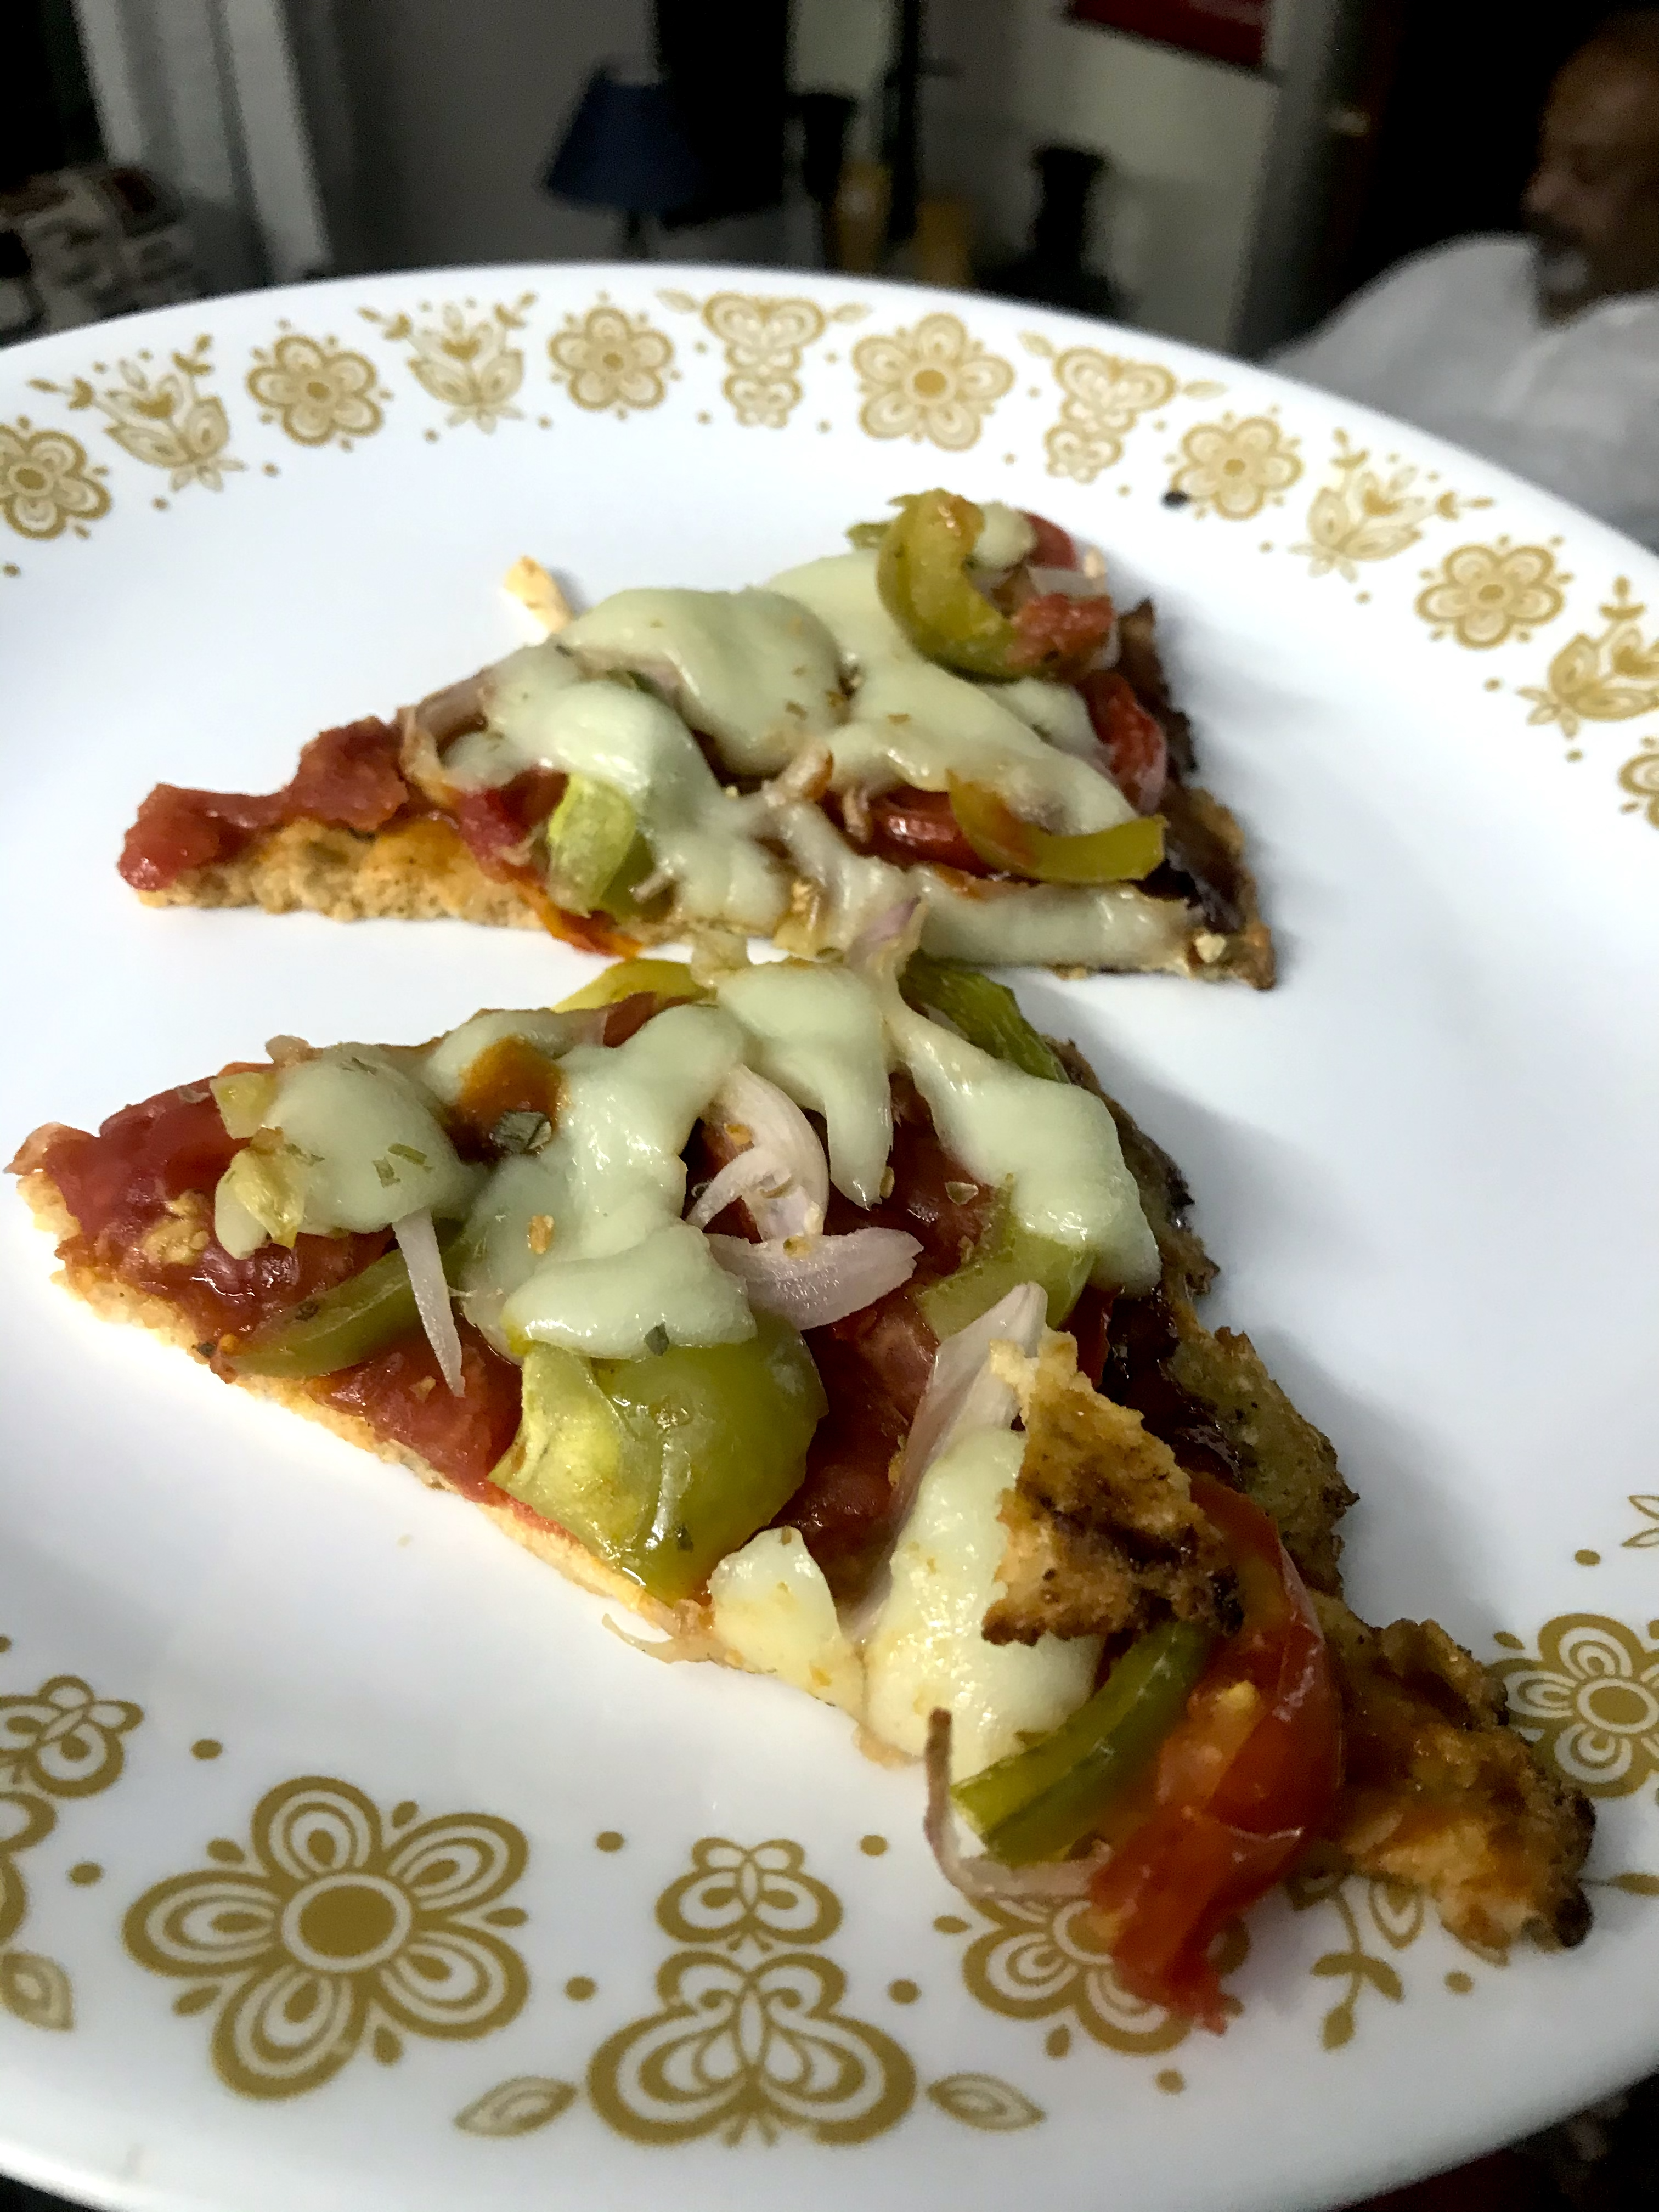
Toppings:
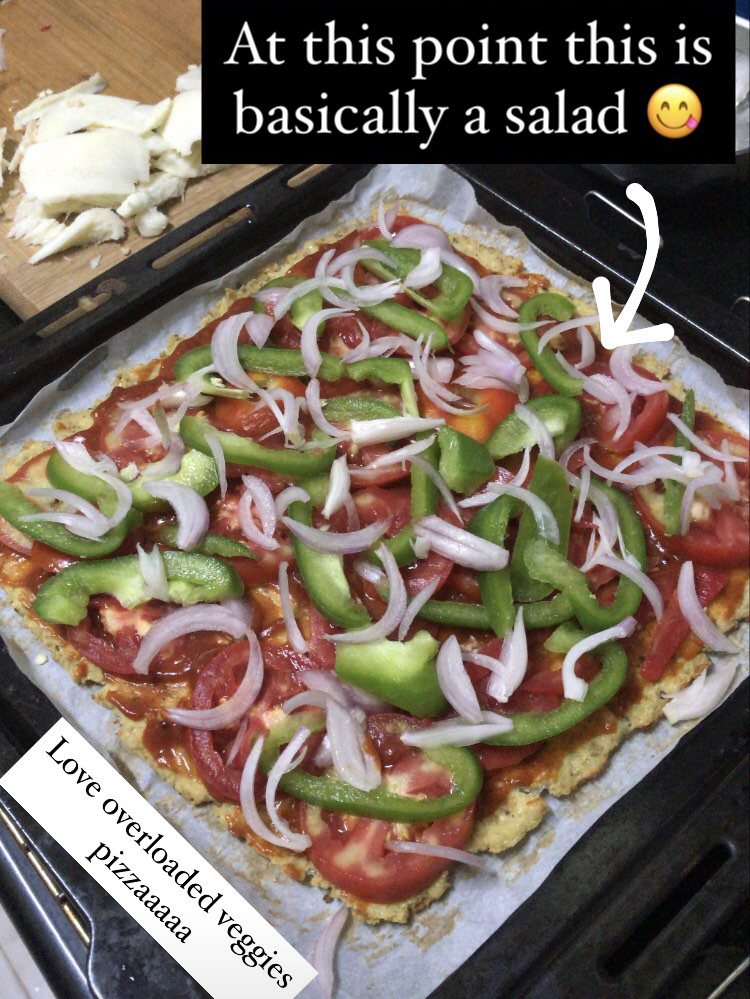
- Slice all your veggies – tomatoes in round circles, onions in half-moon slices and capsicum in half-moon slices and then make it another half (it’s easer to eat and you can see the pics for a better reference)
- When your base is baked, make a mix of the tomato sauce + garlic chutney and then slather that on over the base
- Start layering your veggies – i prefer to first put all the tomatoes, then onions, then capsicum
- I don’t add salt/pepper on these as the dough already has salt, so I just leave the veggies’ natural flavour shine
- Bake this for 5 minutes at 180c. The reason I’m not adding the cheese yet, is because I want these veggies to get that nice roastyy flavour which just gets soaked up into the crust. Yummm
- Take the pan out, top with shredded cheese and bake at 180c for 5 more minutes until the cheese melts
- Enjoy!
Tips:
- It’s very important to use a good quality baking paper. I used wax paper once and the crust just WOULDN’T come off and we had to painfully scrape off the paper bit by bit. I LOVE the oddy ecobake baking papers – they are awesomeeeee! You can get them here.
- Make sure the cauliflower is dry as can be. Otherwise you won’t get a ‘crust’ but you would probably have to scoop it out and eat like a salad bowl coz it just falls apart
- Taste your cauliflower dough before adding salt & pepper. Some seasonings are super salty, so just to avoid oversalting your dough, do one taste test before adding
